
Step-by-Step Guide: How to Pretreat Clothes Before Washing
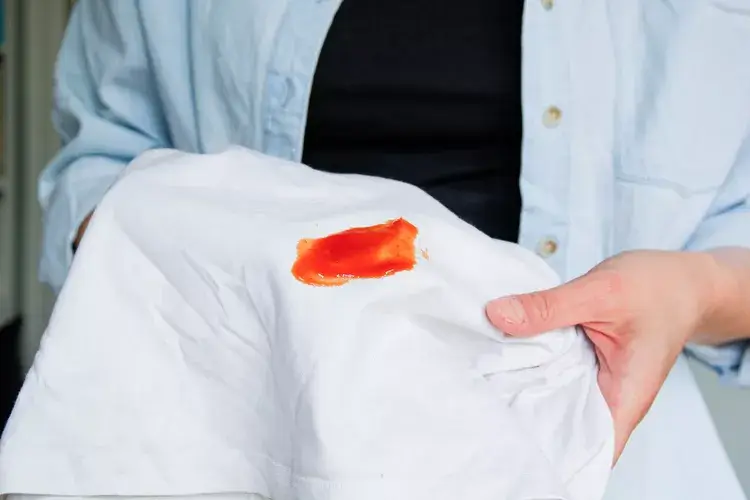
Spilling coffee on a white shirt or finding grass marks on jeans can feel like a disaster. However, the secret to keeping your wardrobe pristine is simple. You must pretreat clothes before washing them. If you skip this step, the stain may remain.
Taking a few minutes to handle a spot now helps keep your favourite garments out of the bin. It also saves you money on replacements and time on rewashing.
When you pretreat clothes before washing, you start breaking down the stain at its source. This allows your machine to do a much better job. Many people also turn to professional services, such as Love2Laundry, when stains are difficult to remove. They know that proper treatment is the difference between a clean shirt and a ruined one.
This guide will show you exactly how to handle different spots like a pro. With the right steps, you can get “Stains Out of Shirts in 10 Minutes” and keep your outfits looking brand new.
Why Pretreating Stains Before Washing Is So Important
Simply tossing a stained item into the machine is rarely enough. Washing alone often fails because water and detergent do not penetrate deeply enough during a standard cycle. When you pretreat clothes before washing, you give the cleaner a head start.
There are several key benefits to this extra step:
- Prevents stains from setting permanently: Without a laundry pre-treatment, many spills bond to the fabric during washing.
- Improves washing machine performance: It loosens dirt so the machine can rinse it away more effectively.
- Extends garment life: You won’t have to scrub as hard or wash as often, which keeps fibres strong.
- Reduces need for harsh chemicals: A focused pretreatment laundry stain remover works better than using too much bleach in the whole load.
- Saves re-washing and water: You get it right the first time instead of running the machine twice.
Timing Matters When Treating Stains
Speed is your best friend when a spill happens. A fresh mark is much easier to handle than a dried one. The longer a spot sits, the more it reacts with oxygen and sinks into the weave. If you wait too long, you might need a very strong best stain remover for clothes to see any results.
Fresh Stains vs. Set-In Stains
A fresh stain is still on the surface of the material. It has not yet bonded with the fibres. If you catch it fast, a simple rinse might be enough. On the other hand, a set-in stain has dried and hardened.
Heat is the enemy here. Never use hot water on a fresh stain unless you’re sure it’s greasy or oily. Heat “cooks” proteins like blood or milk into the fabric. Also, avoid dryers at all costs until the spot is gone. The high heat of a dryer acts like an oven, baking the mess into the fabric permanently. Always pretreat clothes before washing to ensure the mark is gone before it ever hits the heat.
Step 1 – Identify the Type of Stain
To choose the right stain treatment for clothes, you must know what you are fighting. Different substances require different chemical reactions.
- Protein stains (blood, sweat, dairy): These are organic. They need enzymes to break them down. Always use cold water first.
- Oil & grease stains: These repel water. You need something that cuts through fat, like dish soap or a specialised pretreatment laundry stain remover.
- Tannin stains (coffee, tea, wine): These are plant-based. They often need an acid, such as vinegar, or a concentrated laundry detergent for stains.
- Dye-based stains (ink, makeup): These are the toughest. They often require alcohol or very specific solvents to lift the pigment.
Step 2 – Check the fabric care label first
Before applying any product, check the care label inside your garment. This is a key rule for stain removal before washing, because some fabrics are too delicate for at-home methods.
- Silk: Very sensitive to water and chemicals. It can easily water-spot or fade.
- Wool: Can shrink or matt if you rub it too hard or use the wrong temperature.
- Linen: Strong, but it can lose its shape if handled roughly.
- Delicate or embellished garments: Items with beads or sequins need a very gentle touch.
If the label says “Dry Clean Only,” do not try to pretreat laundry stains at home with water. This is when a professional service like Love2Laundry is much safer. They have the tools to handle luxury fabrics without causing damage. You can check our prices online to see how affordable expert care can be.
Step 3 – Choose the right pretreatment method
Once you know the fabric and the stain, choose the right approach. You can use store-bought products or items from your pantry.
Store-bought stain removers
These are designed for convenience. Look for the following types:
- Enzyme-based removers: Great for grass, blood, and food.
- Oxygen-based products: Safe for most colours and useful for lifting dullness.
- Liquid laundry detergent for light stains: A small drop of your regular liquid detergent can be an effective laundry pre-treatment.
Natural and home pretreatment options
If you prefer a greener approach, these can work well:
- Bicarbonate of soda (baking soda): Helps absorb odours and lift oils.
- White vinegar: Useful for reducing yellow sweat marks.
- Washing-up liquid (dish soap): Excellent for cutting through grease and oil.
- Hydrogen peroxide: Effective for blood on white clothes.
Warning: It can bleach colours, so only use it on whites and always test on a hidden area first.
Step 4 – How to pretreat stains properly (hands-on method)
This is the most critical part of the process. You must be gentle but thorough. Follow this guide to pretreat clothes before washing correctly.
Step-by-step pretreatment process
- Blot excess stain: Use a clean cloth or kitchen roll to absorb any excess liquid. Don’t rub, as this pushes the stain deeper into the weave.
- Apply pretreatment solution: Put your pretreatment laundry stain remover directly on the stain.
- Gently work it in: Use your fingers or a soft-bristled brush. Work from the outside of the stain towards the centre.
- Let it sit: Give the product time to work. Usually, 10 to 15 minutes is enough. For tougher stains, leave it for up to 30 minutes.
- Rinse or proceed to wash: Rinse using water at the correct temperature, or place the item straight into the machine.
Step 5 – Washing after pretreatment (do this correctly)
Your work isn’t done after you pretreat clothes before washing. The wash cycle itself must be right.
- Use cold or warm water: Most stains lift better in cooler water.
- Avoid hot water for protein stains: If you’re dealing with blood or milk, hot water can set the stain.
- Wash separately if needed: If the stain is large or involves dyes, wash the item alone to avoid transferring colour to other clothes.
- Check the stain before drying: This is the golden rule. If the stain is still there, do not put it in the dryer. Repeat the pretreatment and wash again.
Common Pretreating Mistakes to Avoid
Even with good intentions, you can make things worse. Avoid these common errors when you pretreat clothes before washing:
- Scrubbing fabric too hard: Many people think scrubbing hard is the only way to lift a mark. In reality, this ruins the texture and spreads the mess deeper into the weave. You might even damage the fabric permanently, causing it to pill or develop holes. Always use a gentle dabbing motion to protect the integrity of your garment.
- Using hot water too soon: This is the fastest way to make a stain permanent. High temperatures act as a binder for proteins. If you use hot water on blood, egg, or milk, you are essentially cooking the stain into the fabric. Stick to cool or lukewarm water until you are certain the mark is starting to lift.
- Mixing chemicals: It’s crucial to avoid mixing chemicals when pretreating laundry stains. Never mix bleach with ammonia, vinegar, or other harsh cleaners. Doing so produces toxic chlorine gas, which is highly hazardous to inhale. Stick to one product at a time and rinse the fabric thoroughly between different treatments.
- Drying before the stain is gone: This is a very common mistake. Once a garment hits the high heat of a tumble dryer, the stain is likely permanent. The heat sets the stain into the fabric. Always inspect the item as it comes out of the washing machine. If the spot remains, repeat the laundry pre-treatment while the item is still damp.
- Ignoring care labels: These tags exist for a reason, and disregarding them can lead to fabric damage. If you ignore a “Dry Clean Only” label and try to pretreat clothes before washing them in a sink, you might cause the fabric to shrink, bleed colour, or lose its shape entirely.
- Applying too much product: More is not always better. Using too much pretreatment laundry stain remover can leave a gummy residue that is hard to rinse out. This residue can actually attract more dirt over time. Focus on using just enough to cover the spot.
When Home Pretreatment Isn’t Enough
Sometimes, a DIY stain removal before washing just won’t cut it. Some messes are too big or too old for home products. If you have an old grease mark or a spilt glass of wine on a silk dress, it is time to call the experts.
Love2Laundry provides professional care for your most difficult items. We can help with:
- Old or stubborn stains that won’t budge.
- Delicate or luxury garments like suits and silk.
- Special items like wedding dresses.
- Time-sensitive needs that require quick, professional care.

Pro Tips from Love2Laundry for Better Stain Removal
The experts at Love2Laundry have seen every kind of mess. Here are our top secrets for success:
- Always test first. Apply your cleaner to a hidden seam to make sure it doesn’t ruin the colour.
- Treat stains from the back. If possible, flip the fabric and apply the remover from the reverse side. This pushes the stain out of the fibres instead of through them.
- A small amount of product works better. Drenching the fabric can make it hard to rinse out. A small, focused amount is better.
- Patience is more effective than aggressive scrubbing. Let the chemical work for you. Give it time to sit.
Pro Tip: Simple ways to remove stains, just a bit of cold water and a drop of soap is all you need if you act fast.
FAQs – Pretreat Clothes Before Washing
Can I pretreat stains overnight?
Yes, for many fabrics like cotton, it’s safe to let the laundry pretreatment sit overnight. However, do not do this with harsh chemicals or on delicate silks, as it might weaken the fibres or cause fading.
Is baking soda safe for colored clothes?
Yes, baking soda is very gentle. It is a great natural way to pretreat laundry stains on colored items without the risk of bleaching. It also helps remove odours.
What is the best pretreatment for grease stains?
The best stain remover for clothes that have grease is usually simple liquid dish soap. It is designed to break down fats.
Final Thoughts
Learning how to pretreat clothes before washing is an essential skill for anyone wanting to preserve their wardrobe. It is not just about cleaning; it is about preservation. By identifying the type of stain and selecting the appropriate laundry pre-treatment, you ensure your clothes stay bright and fresh. Remember to act quickly, avoid high heat, and check fabric labels before you start.
If you find yourself struggling with a particularly difficult spot, don’t forget that help is available. Whether you need to get stains out of white clothes or save a delicate suit, professional services are the way to go. Following these steps will make your laundry day much more successful. Next time you see a spill, don’t panic. Just pretreat clothes before washing and let the science of cleaning do the hard work for you.